AWS Geo Blocking with CloudFront and WAF
by Yuval Oren, Co-Founder / CEO
In this post, I will show you how to use CloudFront or AWS WAF to enable geo-blocking (blocking based on geographical location) for your website or APIs.
Sometimes, you need to restrict web access originating from specific geographical locations. You may need to do this to fend off a DDoS attack, block targeted attacks from specific countries, or reduce overall traffic.
If you use web-based resources hosted on AWS, it is pretty simple to achieve with CloudFront or using the AWS WAF (Web Application Firewall).
Before I go into details on how to configure this on AWS, I want to explore the two approaches:
- White listing countries
- Black listing countries
Whitelisting means creating a list of countries that will be allowed to access your web resources. If traffic originates from a country that is not on this list, we want to block it.
Blacklisting means creating a list of countries that are not allowed to access your resources. If the traffic originates from a country on the list, we want to block it.
Which one is right for your use case? It depends on what you are trying to do. If you only want traffic from a few countries you are sure of, then I suggest a whitelist. Otherwise, it leaves room for errors.
If there's a specific set of countries that you want to block, then a blacklist will do.
Geo-Blocking using CloudFront
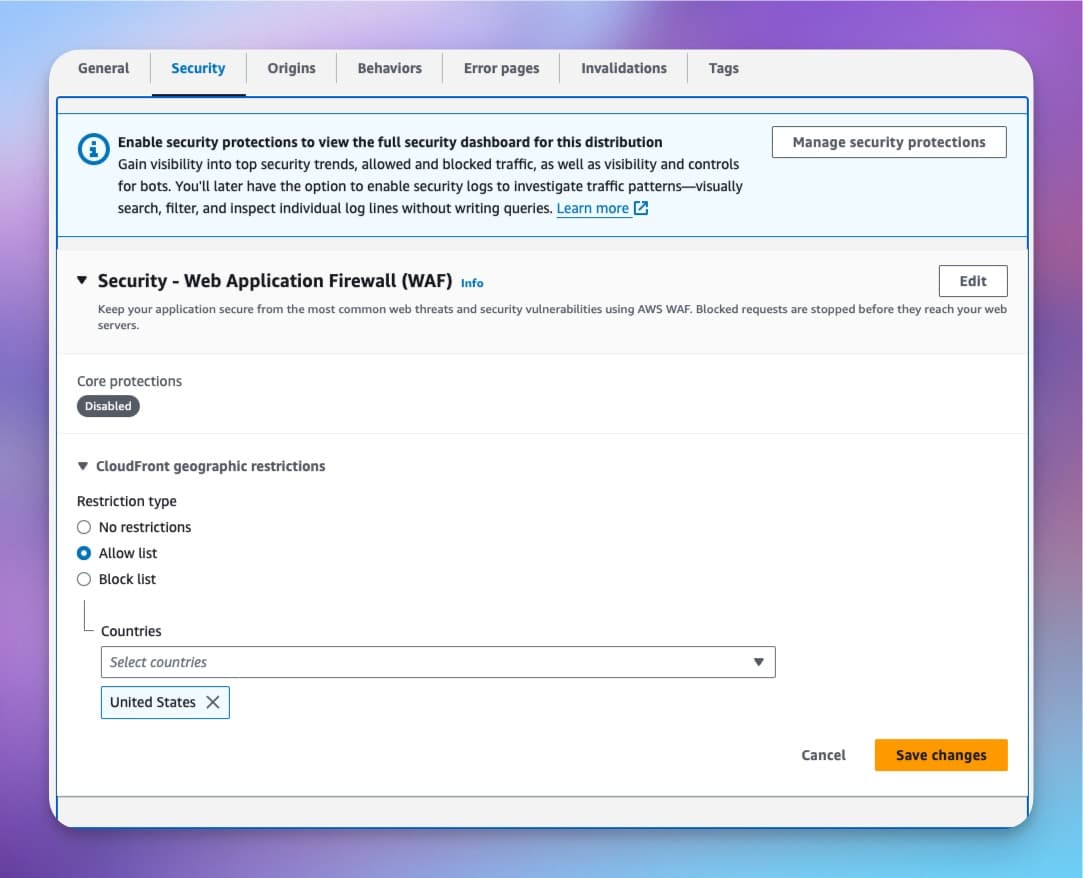
If your resources are published with CloudFront, then it's simple. Go to the distribution's security settings, expand "CloudFront geographic restrictions", and click Edit.
Now choose an Allow or a Block list and pick the countries you wish to allow or block.
Geo-Blocking using AWS WAF
For resources that are not behind CloudFront, such as API Gateways, ALBs, Cognito, etc., you will have to use the AWS Web Application Firewall to configure geo-blocking. (_If CloudFront is in front of these as well, you can still use CloudFront to restrict access instead of WAF)
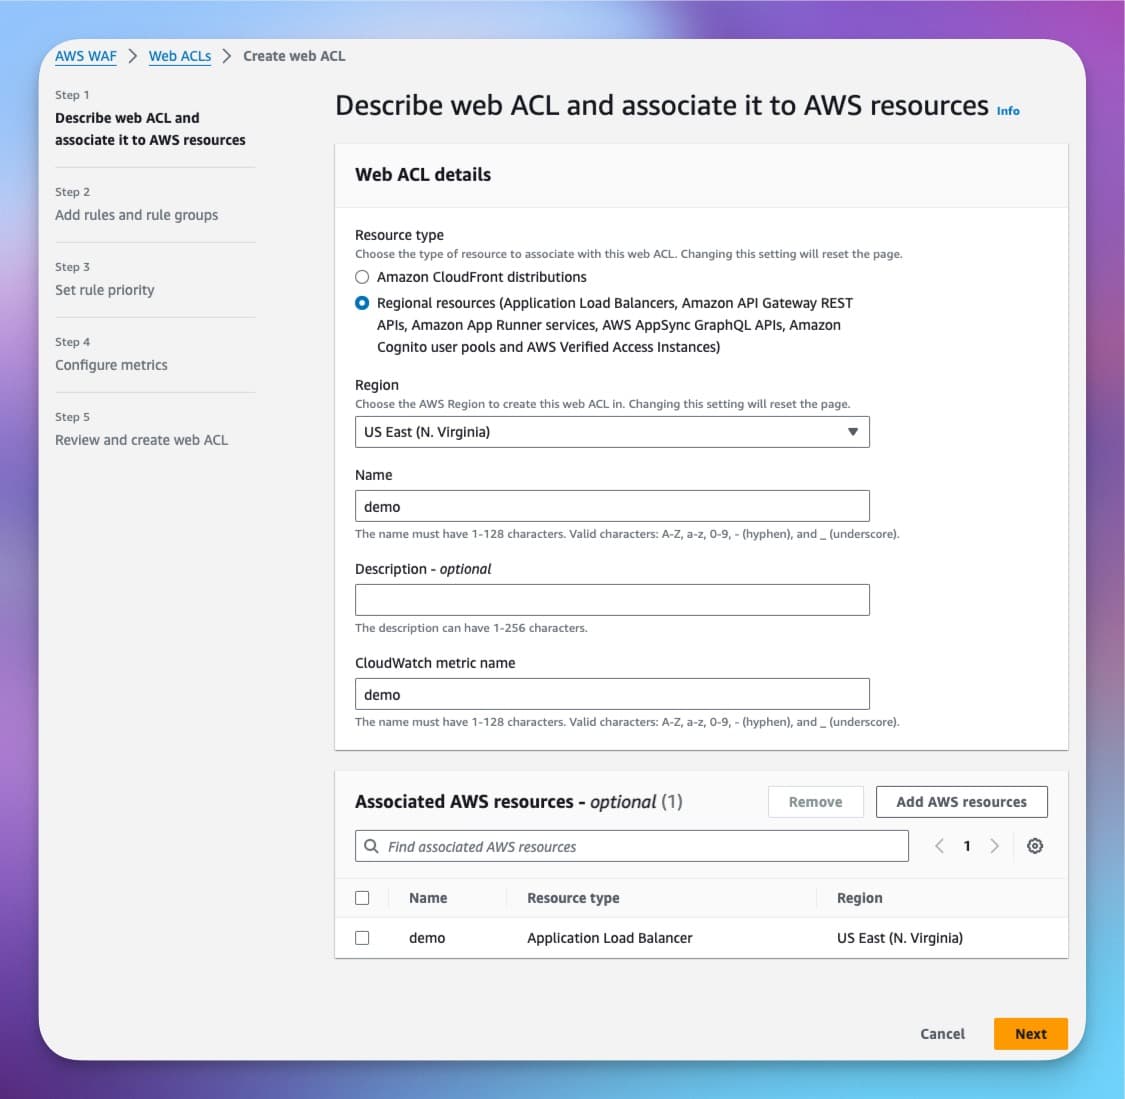
We need to create a WAF ACL (access list) with a custom rule.
If your resources don't already have a WAF attached, then create a new ACL. Give it a name, and attach the right resource, and click Next.
Then click on Add Rule → "Add my own rules and rule groups".
If you choose to create a white list of countries that are allowed to access your website then set the "If a request" to "doesn't match the statement (NOT)".
If you choose to create a black list, then keep it at "match the statement".
Under "Statement" → "inspect", choose "Originates from a country in" and then add the country codes you want to block/allow.
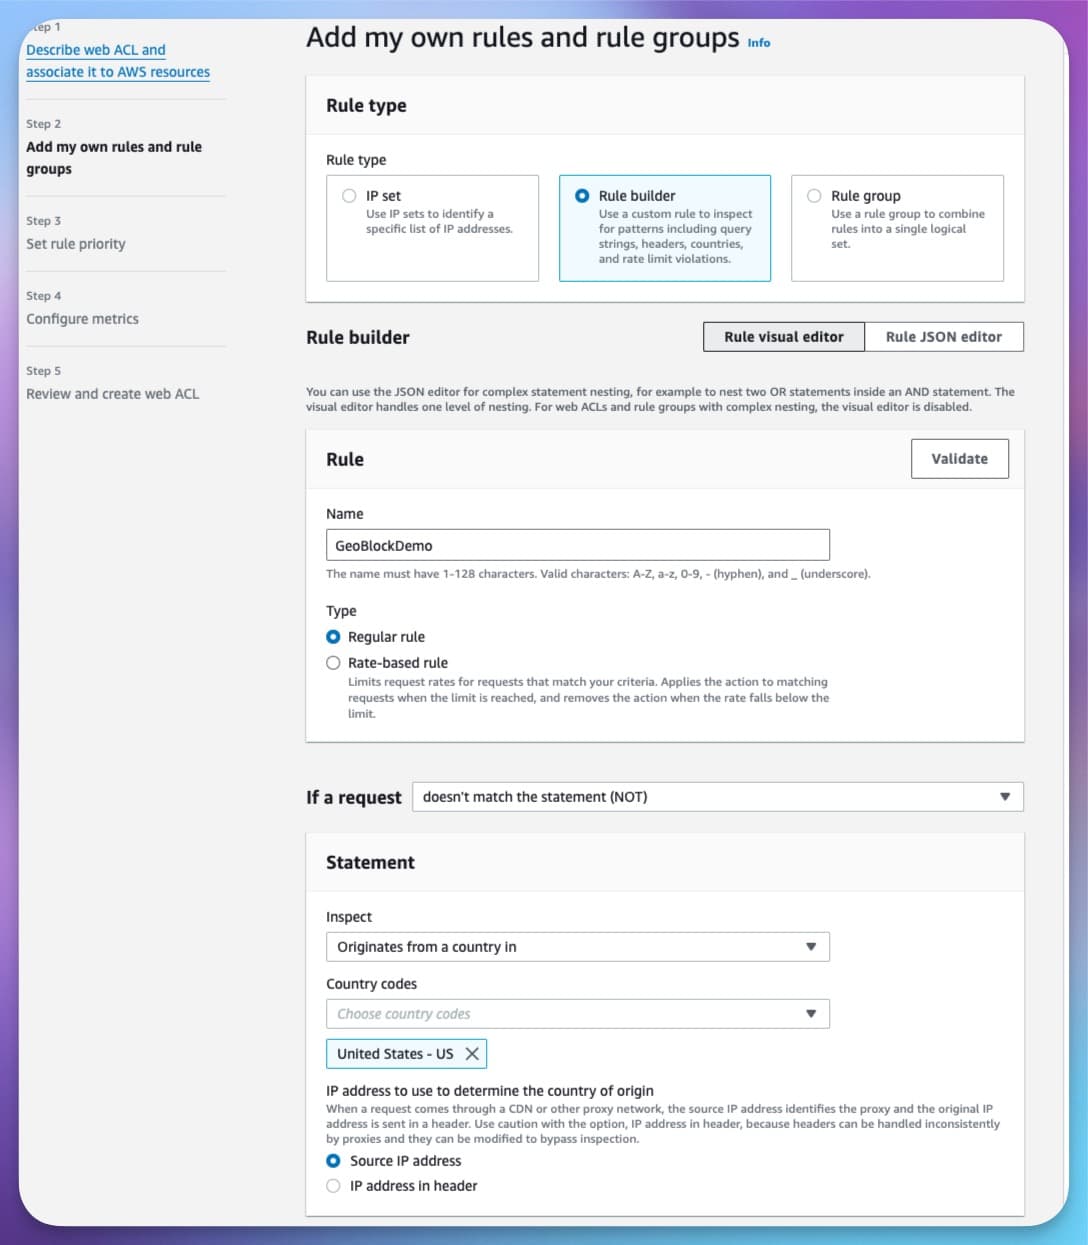
Make sure the action is set to Block and click Add Rule.
New to AWS WAF?
Learn how we use a three-step process to set up the AWS WAF.